Setting up the Yale ConnectX for the first time
1. If you have not previously onboarded the Yale ConnectX bridge, to begin the onboarding process, in the Yale Home app home screen menu, select set up a device.
2. Scan the back of the ConnectX with the QR scanner to begin the set-up flow.
3. Follow the onboarding steps in the Yale Home app.
4. The lock should now be successfully paired to the Yale ConnectX WiFi bridge.
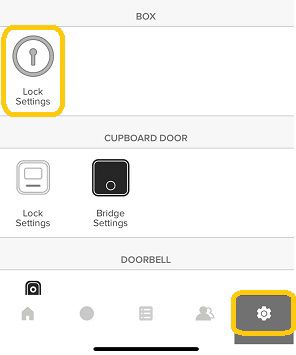
Adding your ConnectX to additional locks in your house
1. If you have added the Yale ConnectX to one Yale Smart Lock and want to add more, go into the general settings page in Yale Home app by selecting the small gear icon.
2. Now go into the Lock settings of a compatible lock you would like to configure to the Yale ConnectX. (This lock will not show a bridge next it)
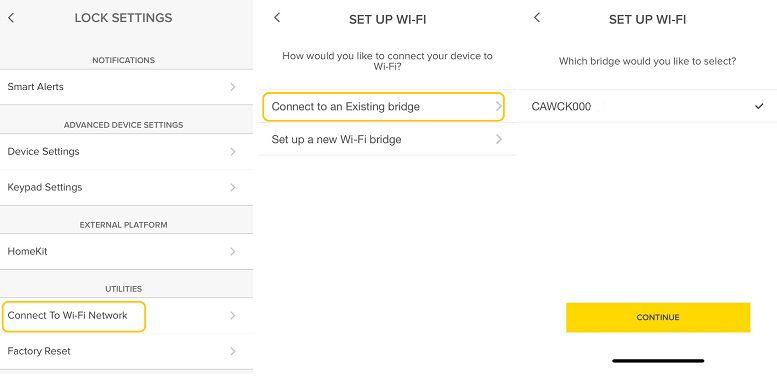
3. Scroll down to the section, Utilities and click on connect to a Wi-Fi network.
4. Click connect to an existing bridge.
5. The ConnectX serial number will be shown on the screen, select the serial number of the ConnectX that you want to configure.
6. Press continue, the ConnectX should now be successfully configured to the Yale Smart lock.