This guide provides steps to set up your Yale Smart Keypad for the first time.
NOTE: To connect the keypad to an existing lock, any previously connected keypads need to be disconnected.
1. Unclip the back panel from the keypad.
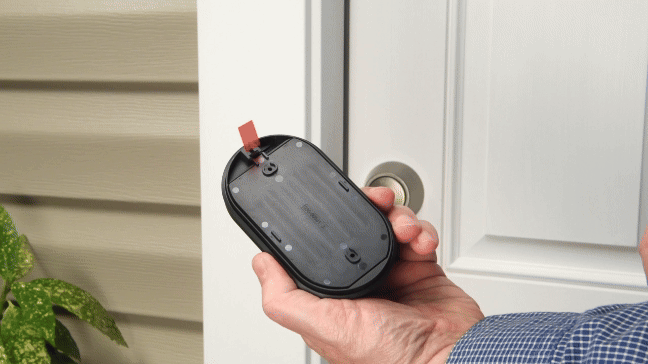
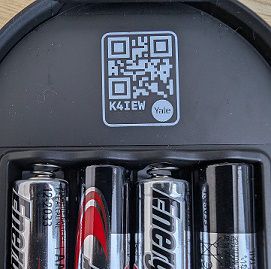
2. Remove the battery isolating pull tab, this will power on the keypad for the first time.
3. After removing the battery-insulating pull tab, ensure the LED dots on the front of the keypad are blinking.
4. Open the Yale Home App and select the + icon from the top right corner of the dashboard.
5. Scan the QR code on the back of the keypad located above the batteries when prompted.
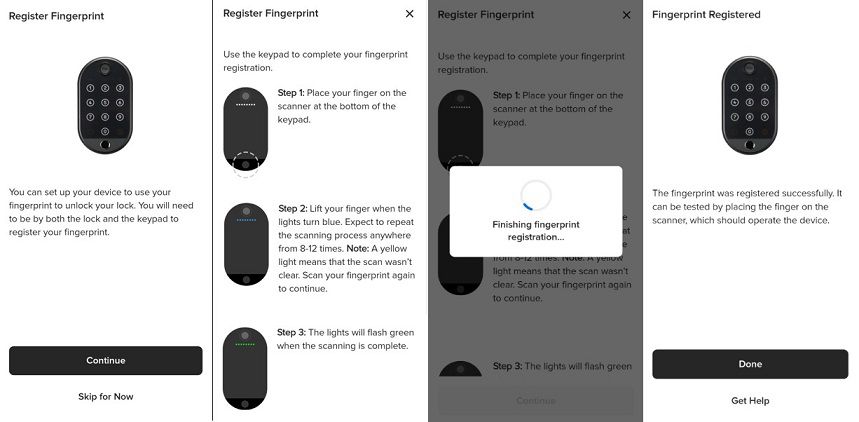
6. Select Start Setup and follow the onscreen instructions in the Yale Home app. You will see a series of screens as the Yale Home app connects to your Smart Keypad 2. As part of the onboarding process, the Yale Home app will first download and install any new firmware updates into the keypad. You will then be asked to select the Yale Lock you want to link the keypad with.
7. Congratulations! Your Smart Keypad 2 is ready to use.