Kako namestiti: Yale Linus® - Euro Cylinder
Ti koraki bodo pomagali pri namestitvi Linus® Smart Lock.
Ti koraki bodo pomagali pri namestitvi Linus® Smart Lock.
Ta stran vas bo vodila skozi namestitev vaše ključavnice Linus na združljiv cilinder Euro Profile. Če potrebujete informacije o tem, ali je vaš cilinder združljiv, jih lahko najdete tukaj.Če potrebujete navodila za namestitev nastavljivega cilindra Yale Linus®, jih lahko najdete tukaj.
Ključavnico Linus lahko namestite na dva načina, odvisno od tega, ali vaš cilinder štrli iz vratnega pohištva na notranji strani vrat za vsaj 3 mm (glejte spodnji video). Na podlagi tega spodaj izberite ustrezno možnost:
Ta video vas bo popeljal skozi postopek namestitve, pisna navodila pa so na voljo tudi spodaj.
Please continue with setup of the Linus® unit by downloading the Yale Access App.
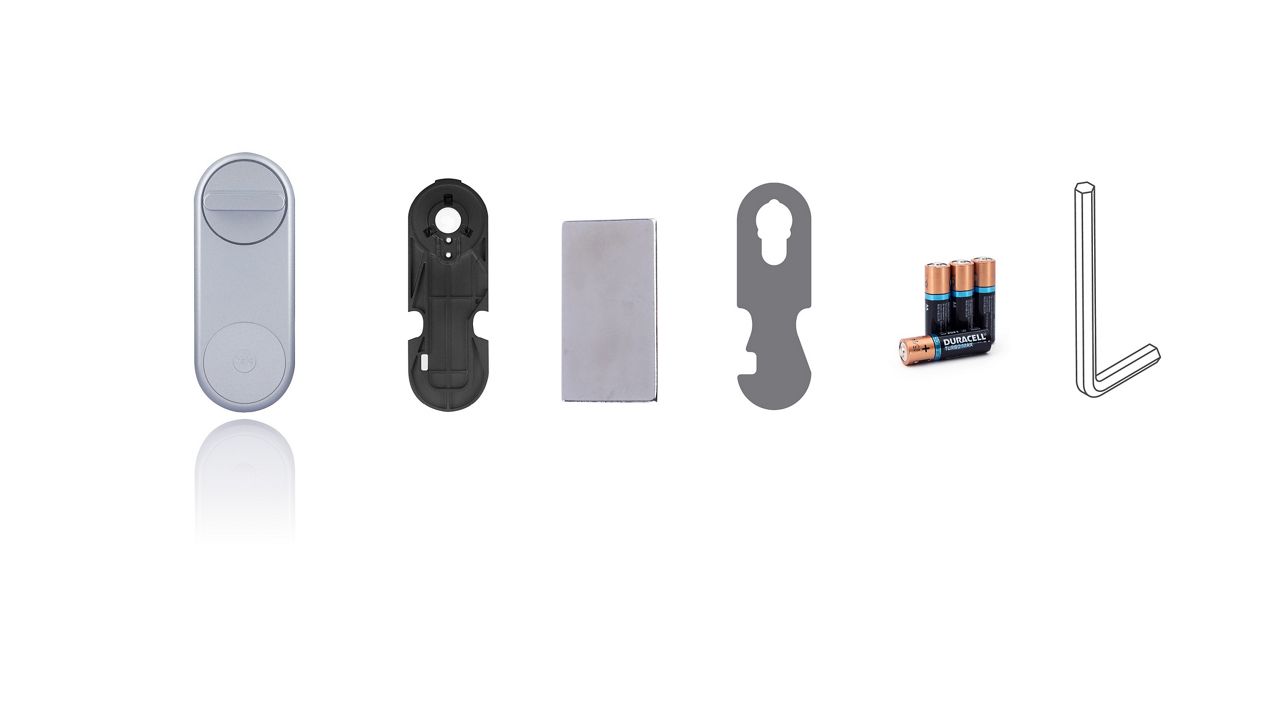
Here you see which components are included in the box and which tools you need to carry out the installation of your new Yale Linus lock.
The box contains the following components:
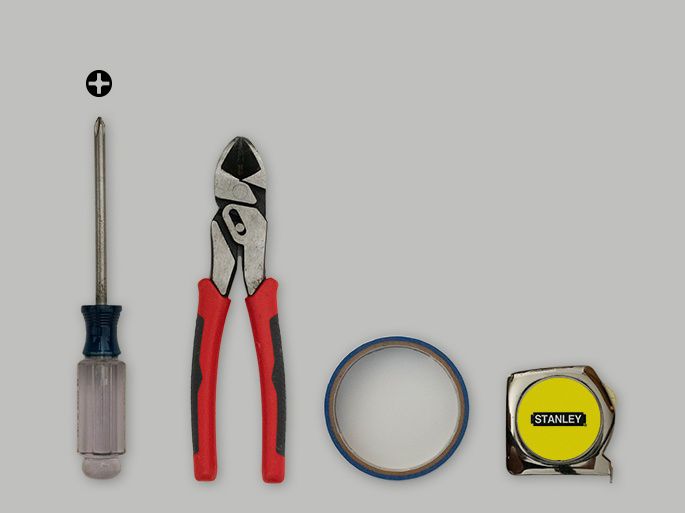
For a standard installation, the tools required are:
Take the Linus® unit out of the box and open the wings to remove the mounting plate.

Add the mounting plate onto the internal side of your existing cylinder. You may need to loosen the grub screws (the screws on the mounting plate that go around the cylinder) in order to secure the plate properly. This can be done using the Allen key that is provided in the box. Once the plate is on the cylinder, tighten the screws back up holding the short end of the Allen key.

Insert the key into the internal side of your cylinder.

Mount the Linus® unit onto the mounting plate pushing the top of the unit onto the mounting plate first.

Close the ‘wings’ on the Linus® unit to securely fix it in place.

Peel the backing film from the DoorSense™ magnet

Stick the DoorSense™ magnet on the door frame, level with the Yale logo on the Linus® Smart Lock.

The yalehome.com/us site has migrated to shopyalehome.com for U.S. and Canada customers and partners. Do you want to stay on this page or go to the U.S./Canada site instead?
Go to the U.S./Canada siteStay on this page