Yale Smart Keypad on white wall.

Getting Started with Yale Smart Keypad 2 - Fingerprint

Here you can find the answers how to Getting Started with Yale Smart Keypad 2 - Fingerprint

FAQ

  •  

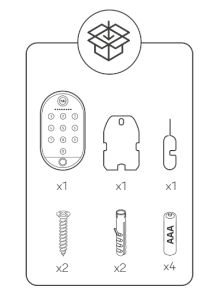
  • 1 x Yale Smart Keypad 2 - Fingerprint

    1 x Double-sided adhesive 

    1 x Back panel removal tool

    2 x Screws

    2 x Wall plugs

    4 x AAA Batteries 

  • Yale Home is the application to use on your Smartphone. The app is available on the Apple App Store or Google Play.

    Download the Yale Home App from the links below.


    Once you have downloaded the Yale Home app you will need to click on 'Create an account' or 'Sign in' if you already have an account.

  • This guide provides steps to set up your Yale Smart Keypad for the first time.

    NOTE: To connect the keypad to an existing lock, any previously connected keypads need to be disconnected.

    1.  Unclip the back panel from the keypad. 
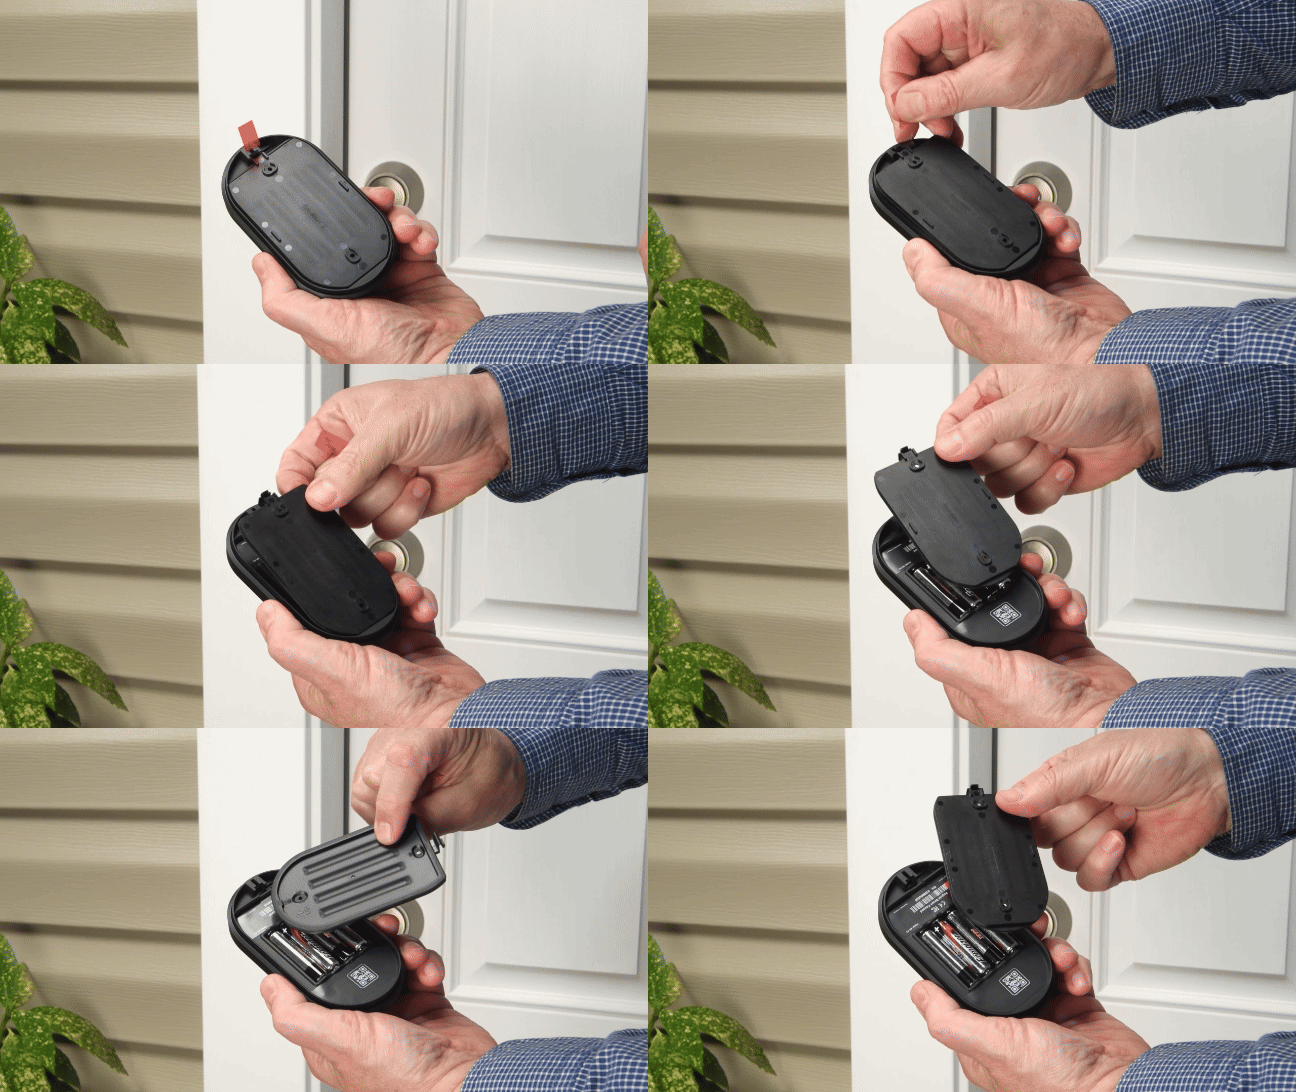
     

    2.  Remove the battery-insulating pull tab, this will power on the keypad for the first time. 

    3.  After removing the battery-insulating pull tab, ensure the LED dots on the front of the keypad are blinking.

    4.  Open the Yale Home App and select the 3 lines on the left to open the menu, then tap Set Up New Device.

    5.  Scan the QR code on the back of the keypad located above the batteries when prompted.
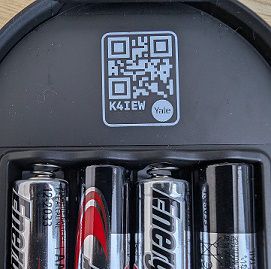
    6.  Select Start Setup and follow the onscreen instructions in the Yale Home app. You will see a series of screens as the Yale Home app connects to your Smart Keypad 2. As part of the onboarding process, the Yale Home app will first download and install any new firmware updates into the keypad. You will then be asked to select the Yale Lock you want to link the keypad with.

    7.  Congratulations! Your Smart Keypad 2 is ready to use.
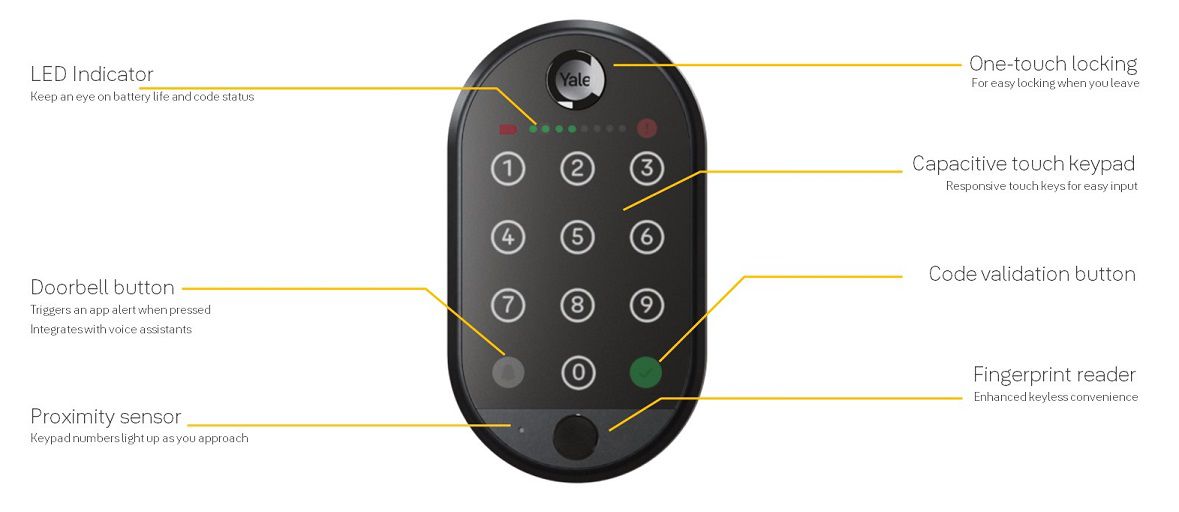
  • There are two ways to mount the Yale Smart Keypad 2 onto your property. You can use the adhesive pad or the screw fittings that are supplied in the box. 

    Note - You can select and view the complete installation guides within the Yale Home application when setting up the keypad. 

    • Adhesive Pad Mounting method:


    • Screw mounting method:


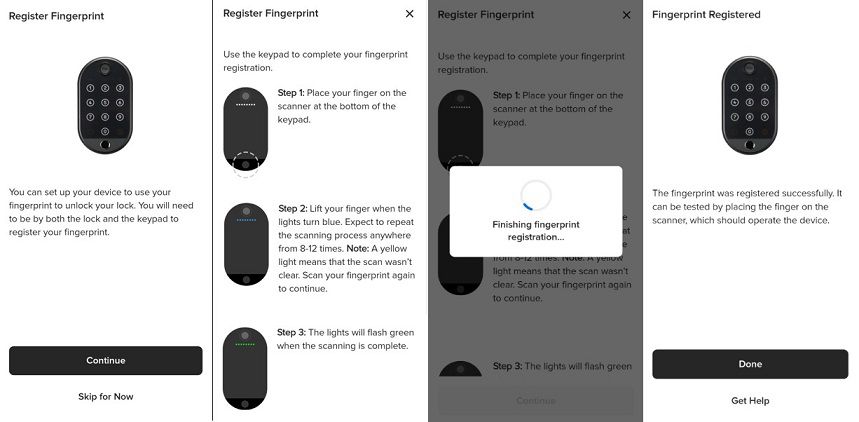
  • When setting up the keypad for the first time in the Yale Home app, you are given the option to register your fingerprint.

    Below is an example of the in-app fingerprint registration process. 

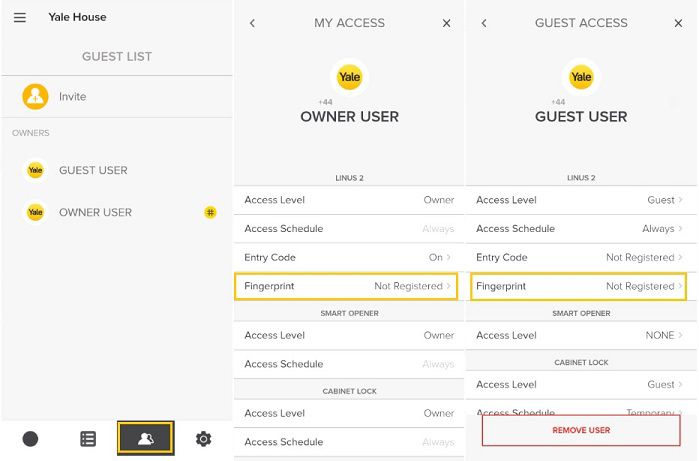
    Alternatively, if you select 'skip for now' during the first-time setup, a fingerprint can be added to a user via the Guest List menu as shown below:

    Note - from here you may also register a Guest's fingerprint.

  • The Yale Smart Keypad 2 will automatically power on when inserting the batteries. 

    Note- The same applies if you ever want to power off the keypad permanently, remove the batteries.

  • No, the Yale Smart Keypad 2 can only be powered by the AAA batteries supplied in the box.

  • The Yale Smart Keypad 2 - Fingerprint takes 4 x AAA batteries, we recommend using good quality branded batteries. ​

  • The expected battery life is 6 months.

  • The rating is IP55 – water and dust resistant.

  • Operating Temperature: -20℃ to 50℃

    Storage Temperature: -30℃ to 70℃

    Operating Humidity: 0 to 90%

  • Dimensions: 69 mm (W) x 122 mm (L) x 19 mm (D)

    Weight: 142 g

If you need additional support

You can get a more visual help related to our products at our download center and in our library for support videos. 

Need More Help?